wrestling / TV Reports
Slimmer’s WWE Hell in a Cell 2020 Review
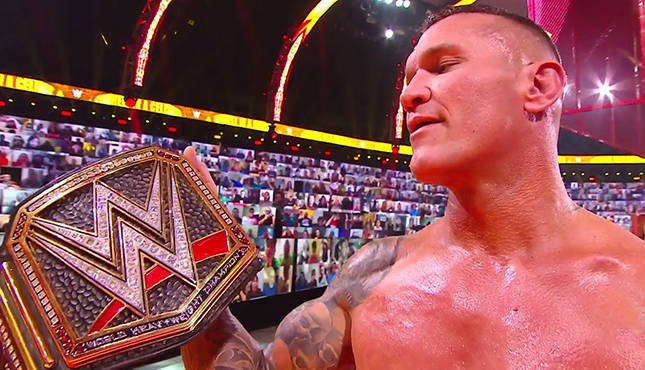 Image Credit: WWE


Welcome to 411’s WWE Hell in a Cell 2020 Report. We are LIVE in beautiful Orlando, Florida. Tonight’s Kickoff Show panelists are Charly Caruso, Booker T, Jerry “The King” Lawler, Jeff Jarrett, and Peter Rosenberg. The start off by running down the entire card before heading to a video package for Bayley vs. Sasha Banks. Next up is a video package for Drew McIntyre vs. Randy Orton followed by a video package for Jeff Hardy vs. Elias. Elias joins the Kickoff Show panelists to hype his album and guarantee that he’ll defeat Jeff Hardy tonight. We go to a video package for Otis vs. The Miz before heading to R-Truth vs. Drew Gulak for the 24/7 Championship.
Kickoff Show Match
24/7 Championship Match
R-Truth (Champion) vs. Drew Gulak
Gulak waves to Little Jimmy to start the match and says the he want to talk to him. Gulak gives Little Jimmy a high five, sit him on his knee… and then punts him into the third row. The assault on Little Jimmy enrages Truth, so he charges at Gulak and slams his head into the top turnbuckle. Truth goes to work with mounted punches in the corner, but Gulak knocks him back down to the mat and wrenches on Truth’s leg. Gulak locks in a standing side head lock and then takes down Truth to go back to work on the leg. Gulak goes for a modified Gory Special, but Truth flips over and hits the Cena shoulder blocks. Truth delivers the Protobomb and hits the Five Knuckle Shuffle. Truth goes for the Attitude Adjustment, but Gulak blocks. Gulak works over Truth in the corner, but Truth heads up top to try to escape. Gulak leaps to the top rope, but Truth slides between his legs and goes for an electric chair drop. Gulak tries to counter into a sunset flip, but Truth counters into a jackknife pin for the three count. After the match, Lince Dorado, Gran Metalik, and Akira Tozawa chase Truth out of the ThunderDome.
Match Result: R-Truth defeats Drew Gulak with a jackknife pin.
Match Length: 5:28
Slimmer’s Rating: **
Mustafa Ali challenges the Hurt Business to a singles match tonight, and he says MVP can choose which member of the Hurt Business completes. The Kickoff Show finishes up with a video package for Roman Reigns vs. Jey Uso, which will be the first match on the main card.
Hell in a Cell “I Quit” Match for the Universal Championship
Roman Reigns (Champion) w/ Paul Heyman vs. Jey Uso
.jpg?width=1920&height=1080&fit=bounds)
Reigns and Uso circle each other to start. They lock up in the middle of the ring, and Reigns drops Uso with a shoulder block. Reigns drags Uso back to his feet and immediately levels him with an uppercut. Reigns slams Uso and clotheslines him in the corner. Reigns delivers another corner clothesline, and it’s been all Reigns so far. Reigns goes for a third corner clothesline, but Uso gets his boots up. Uso connects with a spinning kick, and Reigns heads to the outside to regroup. Uso hits a suicide dive that sends Reigns into the cell. Reigns heads back into the ring, but Uso sends him back to the outside and connect with a second suicide dive. Uso whips Reigns into the cell and then rolls him back into the ring. Uso goes for a splash in the corner, but Reigns counters with a spear to halt Uso’s momentum. Reigns slides out of the ring to grab a steel chair from under the ring, but Uso catches Reigns with a drop kick between the ropes. Uso goes for a suicide dive, but Reigns counters with a forearm shot between the ropes. Reigns heads back into the ring and hits another spear to further his advantage. Reigns goes for a third spear, but Uso counters with a knee shot. Uso hits up top and hits the Uso splash. Uso heads back up top and hits a second Uso splash. Uso heads to the outside and grabs a leather strap. Uso whips Reigns with the strap several times, but Reigns hits a spear out of nowhere to regain control. Reigns grabs the leather strap and begins to whip Uso. Reigns wraps one end of the strap around Uso’s wrist and continues to whip him. Reigns wraps the other end of the strap around his own wrist, effectively making this a strap match. Uso fights back to his feet and trade shots with Reigns. Reigns goes for the Superman Punch, but Uso uses the strap to avoid contact. Uso uses the strap to choke Reigns, but Reigns refuses to quit. Uso frees himself from the strap and grabs the steel chair that Reigns threw into the ring earlier in the match. Uso goes for a chair shot, but Reigns counters with a Superman Punch. Reigns locks in the guillotine, but Uso refuses to quit. Reigns frees himself from the strap and orders Uso to quit, but Uso still refuses. Reigns drags Uso to the apron and hits the Drive-By. Reigns positions Uso’s head next to the ring post and puts the ring steps on the other side. Reigns hits the Drive-By into the steps, sandwiching Uso’s head between the steps and the ring post. Uso refuses to quit, but the referee says he has to stop the match. Reigns refuses to let the referee stop the match and tosses him out of the ring. The outside referee comes into the cell to check on the first referee as several WWE officials come to check on Uso. Reigns throws the ring steps into the ring and uses them to pin Uso to the mat. Reigns lifts the steps and is about to drive them into Uso’s head, but Jimmy rushes into the ring and covers his brother. Jimmy begs Reigns to stop what he’s doing and says they can work through this together, as a family. Reigns breaks down in tears and takes Jimmy’s hand… before locking in the guillotine on Jimmy. Reigns mercilessly chokes out Jimmy, and Jey finally says “I quit” to save his brother. After the match, Reigns holds the Universal Championship over the Usos as Afa and Sika come out on the stage. Reigns heads up the ramp and stands triumphant with Afa and Sika.
Match Result: Roman Reigns defeats Jey Uso.
Match Length: 29:21
Slimmer’s Rating: **** (The actual action wasn’t anything special, but the storytelling was once again phenomenal.)
Jeff Hardy vs. Elias
.jpg?width=1920&height=1080&fit=bounds)
Hardy muscles Elias to the corner to start, but Elias fights back with a stiff chop. Hardy ducks a clothesline and hits an inverted atomic drop. Hardy stomps on Elias’ back and locks in a hammer lock. Elias reverses into a hammer lock of his own, but Hardy counters back into yet another hammer lock. Elias dumps Hardy to the outside and whips him into the barricade. Hardy whips Elias into the barricade and rolls him back into the ring. Elias flees back to the outside, but Hardy connects with a baseball slides under the bottom rope Hardy goes for a splash off the ring steps, but Elias side steps him, and Hardy crashes into the barricade. The action returns to the ring, and Elias works over Hardy in the corner. Elias levels Hardy with a clothesline and makes the cover for a two count. Elias locks in a side head lock on the mat, but Hardy fights back to his feet and breaks the hold with elbow shots to the gut. Hardy levels Elias with a clothesline and follows up with another inverted atomic drop and a double leg drop for a two count. Elias gets back to his feet and hits Hardy with a powerbomb for a two count of his own. Hardy heads up top and connects with Whisper in the Wind for another two count. Hardy follows up with the Twist of Fate and heads back up top, but Elias rolls to the outside. Hardy climbs down and the outside, but Elias grabs his guitar. Hardy kicks Elias in the gut to make him drop the guitar and then smashes it over Elias’ back for the disqualification.
Match Result: Elias defeats Jeff Hardy via disqualification.
Match Length: 7:51
Slimmer’s Rating: **
Singles Match for the Money in the Bank Contract
Otis w/ Tucker vs. The Miz w/ John Morrison
.jpg?width=1920&height=1080&fit=bounds)
Otis tosses Miz across the ring and then splashes him in the corner. Otis slams Miz and makes the cover for an early two count. Miz gets back to his feet and goes for the Skull Crushing Finale, but Otis blocks. Miz dumps Otis to the outside but misses a drop kick between the ropes. Otis levels Miz on the outside before rolling him back into the ring. Morrison distracts Otis long enough for Miz to hit a DDT for a two count. Miz chokes Otis over the second rope and then distracts the referee so Morrison can hit a cheap shot from the outside. Miz goes to work with the It Kicks and then hits his patented corner clothesline. Miz locks in a sleeper and drags Otis down to his knees, but Otis fights back to his feet and flips Miz over his shoulder to break free. Miz levels Otis with a big boot and goes back to work with the It Kicks. Otis rallies and goes for the Caterpillar, but Morrison pulls Miz out of the ring. Otis retrieves Miz, but Miz fights back with another big boot. Miz whips Otis to the corner and Morrison thinks about hitting him with the MitB briefcase, but the referee sees Morrison and ejects him from ringside. Miz kicks Otis to the ropes, and Tucker shockingly slams the MitB briefcase into Otis’ face. Otis is knocked out cold, so Miz covers him for the three count as Tucker menacingly stares at Otis from ringside.
Match Result: The Miz defeats Otis after a MitB briefcase shot from Tucker.
Match Length: 7:21
Slimmer’s Rating: **½
Hell in a Cell Match for the SmackDown Women’s Championship
Bayley (Champion) vs. Sasha Banks
.jpg?width=1920&height=1080&fit=bounds)
Bayley brings her chair with her into the ring, but Banks kicks it out of her hands as the cell is lowering, and it ends up outside the cell as it finally lower to the ground. The bell rings to start the match, and Bayley is without her favorite weapon. Banks hits an early head scissors takedown in the Bank Statement, but Bayley bites Banks’ hand to break free. Bayley heads out of the ring, and Banks follows her. Bayley slams Banks into the cell and grabs a kendo stick, but Banks takes the kendo stick from Bayley and shoves it between then links of the cell. Bayley grabs a second kendo stick, but Banks blocks a kendo stick shot and counters with a kick to the ribs. Banks pulls a table out from under the ring and repeatedly uses it to drive Bayley into the cell. Banks hits a Meteora off the table and into the cell before rolling Bayley back into the ring and hits a second Meteora off the top. Bayley knocks Banks out of the ring and grabs a chair. Banks evades a chair shot and hits a Meteora off the apron and into the cell. Banks rolls Bayley back into the ring, but Bayley drops Banks neck-first onto the middle rope. Bayley tosses Banks off the apron, but Banks catches herself on the cell wall and then leaps back to the apron. Banks drop kicks Bayley into the ring steps and grabs two kendo sticks. Banks wedges the kendo sticks between the cell wall and the ring steps and tries to suplex Bayley onto them, but Bayley tries to reverse into a suplex of her own, but Banks tries to counter, but Bayley ends up catching Banks with a drop toe hold right into the kendo sticks. Bayley follows up with a catapult into the kendo sticks and rolls Banks back into the ring for a two count. Bayley hits a neck breaker and gets another two count. Bayley goes for a belly-to-back suplex on the apron, but Banks counters into a sunset bomb off the apron and into the cell wall. Banks rolls Bayley back into the ring and gets a two count of her own. Banks sets up a chair and uses it for a modified camel clutch, but Bayley slides out the back and drops Banks face-first onto the chair. Bayley wedges a chair in the corner and hits a running sunset flip that sends the back of Banks’ head into the chair. Bayley covers Banks and gets another two count. Bayley heads up top and hits a diving elbow drop for yet another two count. Banks hits the Back Stabber into the Bank Statement, but Bayley slides out of the ring to break free. Bayley slams Banks into the steel ring beam and then goes to work with a kendo stick. Bayley grabs a roll of ducts tape and tapes two kendo sticks together end-to-end. Bayley uses the two kendo sticks to bridge the ring and the cell wall, but her tape job quickly falls apart. Bayley heads toward Banks, but Banks sprays a fire extinguisher into her face. Bayley stumbles to the cell door and is able to pull her favorite chair into the cell before Banks attacks her. Banks whips Bayley into the cell and hits yet another Meteora into the cell before rolling Bayley into the ring. Banks grabs a kendo stick and goes to work with shots to Bayley’s back and ribs. Banks heads up top and goes for the frog splash, but Bayley pulls her chair on top of her so that Banks lands on the chair. The action spills back to the outside, and Bayley hits the Rose Plant on the floor. Bayley grabs a ladder and slides it into the ring. Bayley sets up two chairs and uses the ladder to bridge them. Bayley drops Banks face-first onto the ladder. Bayley places Banks on the ladder and spray paints an X onto her. Bayley goes for a diving chair shot from the second rope, but Banks rolls out of the way. Banks hits Bayley-to-Belly onto the ladder and gets a two count. Bayley fights back with a Bayley-to-Belly of her own, but Banks kicks out at two. Bayley grabs the chair and goes for a chair-assisted Bayley-to-Belly, but Banks counters into a Bank Statement around the chair, and Bayley has not choice but to tap.
Match Result: Sasha Banks defeats Bayley with a Bank Statement around a steel chair.
Match Length: 26:32
Slimmer’s Rating: ****½
United States Championship Match
Bobby Lashley (Champion) vs. Slapjack
Lashley takes the fight right to Slapjack and works him over in the corner. Lashley hits a vertical suplex, but Slapjack fights back and shoves Lashley face-first into the top turnbuckle. Slapjack hits a drop kick and follows up with a cannonball in the corner. Slapjack hits a tornado DDT and makes the cover for a two count. Lashley fights back with a spinebuster and locks in the Hurt Lock for the win. After the match, the rest of Retribution storms the ring and attacks Lashley. T-Bar and Mace go for a double team choke slam, but the rest of the Hurt Business make the save. Retribution retreats as the Hurt Business stands tall in the ring.
Match Result: Bobby Lashley defeats Slapjack with the Hurt Lock.
Match Length: 3:46
Slimmer’s Rating: *½
Hell in a Cell Match for the WWE Championship
Drew McIntyre (Champion) vs. Randy Orton
.jpg?width=1920&height=1080&fit=bounds)
Orton attacks McIntyre on his way to the ring, and they brawl outside the cell without the match officially beginning. Orton tries to drop McIntyre onto the announce table, but McIntyre blocks. McIntyre lands a punch and slams Orton into the cell. McIntyre beats Orton around the cell and finally tosses him inside. A referee locks the door as the match officially begins. McIntyre continues his assault on Orton and tosses him to the outside. McIntyre slams Orton into the cell and rolls him back into the ring. McIntyre makes the cover but only gets a two count. Orton flees back to the outside, but McIntyre immediately follows him. McIntyre picks up Orton and slams him into the cell before slamming him into the ring post. McIntyre grabs a steel chair and delivers a chair shot to the back. McIntyre again slams Orton into the cell, and it’s been all McIntyre so far. McIntyre picks up the ring steps and slams them into Orton’s face. McIntyre rolls Orton back into the ring and goes for a Claymore Kick, but Orton grabs the chair and connects with chair shots to McIntyre’s knee and back. Orton grinds the chair into McIntyre’s jaw and then catapults him jaw-first into the bottom rope. McIntyre rolls out of the ring, so Orton positions McIntyre’s face on the ring steps and stomps on his jaw. Orton pulls out a table from under the ring and props it up against the cell. McIntyre and Orton head back into the ring, and Orton catches McIntyre with a back breaker for a one count. McIntyre gets back to his feet and slugs it out with Orton in the middle of the ring. McIntyre whips Orton to the ropes and hits an overhead belly-to-belly suplex. McIntyre goes for the Future Shock DDT, but Orton blocks, but McIntyre hits a neck breaker. McIntyre lift Orton onto his shoulders, but Orton floats over and heads to the outside. Orton slams McIntyre’s head into the cell and charges at him, but McIntyre catches Orton with an overhead belly-to-belly suplex through the table that Orton propped up against the cell. McIntyre rolls Orton back into the ring, but Orton kicks the middle rope to low blow McIntyre as he climbs into the ring. Orton hits his patented rope-assisted DDT and gets a two count. Orton heads back to the outside and grabs bolt cutters. Orton cuts the chain and opens the door to the cell. Orton slowly begins to walk up the ramp, but McIntyre charges after him and levels him with a clothesline to the back of the neck. McIntyre whips Orton into the barricade, but Orton fights back and whips McIntyre into the cell. Orton looks around the arena and begins to climb the cell. Orton climbs all the way to the top and stares down at McIntyre. McIntyre climb the cell and joins Orton on the top. Okay, this is a very cool visual. Orton grabs what looks like a steel pipe and takes a swing at McIntyre, but McIntyre ducks and takes down Orton for some ground and pound offense. Orton and McIntyre both begin to climb down the side of the cell, but Orton slams McIntyre’s face into the cell. ORTON KNOCKS MCINTYRE OFF THE CELL AND THROUGH THE ANOUNCE TABLE!!! Orton finishes climbing down from the cell, and McIntyre is bleeding from the mouth. Orton drags McIntyre around the cell and tosses him back inside. Orton goes for the RKO, but McIntyre counters into the Claymore Kick, but the impact knocks Orton out of the ring. McIntyre retrieves Orton and sets up for the Claymore Kick, but Orton ducks and hits the RKO for the three count.
Match Result: Randy Orton defeats Drew McIntyre with the RKO.
Match Length: 30:37
Slimmer’s Rating: ***½
More Trending Stories
- Note On Possible WWE Storyline & Faction For The Creed Brothers (POSSIBLE SPOILERS)
- Tony Khan Weighs In On Warning From Oklahoma Athletic Commission Over Nyla Rose Match
- Backstage Update on WWE’s Plans for WrestleMania 41, Possible Move to March or May
- Jim Ross Recalls Dustin Rhodes Being Fired From WCW For Not Following No-Blood Policy


